Sidebar
it_services:fi:owncloudsharefiles
Table of Contents
Sharing files with ownCloud
This page describes how to synchronize and share files using ownCloud as one does with DropBox or Box.
If you are looking for a description of how to backup your laptop files please refer to this page instead: Setting up backup with owncloud
Note: The icons, the appearance and location of graphical elements depend on the operating system. In this page I show pictures relative to Linux, but they are more or less the same in other operating systems.
Concept
Sharing and sync system as ownCloud are based on this principle:
- one cloud server maintains all files
- one or more cloud clients for one user (your devices) sync their files to the server
- one or more clients can share files via the server
- the folders shared with you by other users will be shown at the base folder of your account on the server. A typical folder structure is as such:
- owncloud/
- your laptop1/
- your myfiles/
- your workstation1/
- your myfiles/
- other user sharedfolder1/
- other user sharedfiles1
- other user sharedfolder2/
- other user sharedfiles2
0. Prerequisites
You need a LUCAS account and the ownCloud desktop app installed.
1. Prepare your machine
Decide a folder where all files will be synchronized. Owncloud default is as follows:
- On Linux, usually
/home/username/owncloud - On MacOSX, usually
/Users/username/owncloud - On Windows, usually
C:\Users\username\owncloud
If you want to change these above you can do so upon configuration as described below.
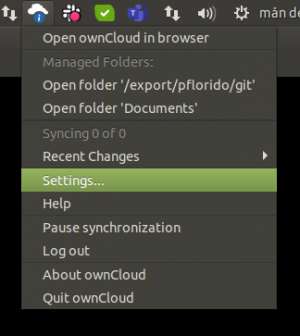
2. Open the ownCloud client
- 2.1 Start the owncloud client

- It might be already running, in which case you can find the icon in your tray and click on “Settings”
3. Connect to server
- 3.1 If you never configured any account, click on
+ Add account. Otherwise skip directly to section 3. Add a base sync/sharing folder - 3.2 Insert the name of the server, in our case https://cloud.lucas.lu.se as in the picture below
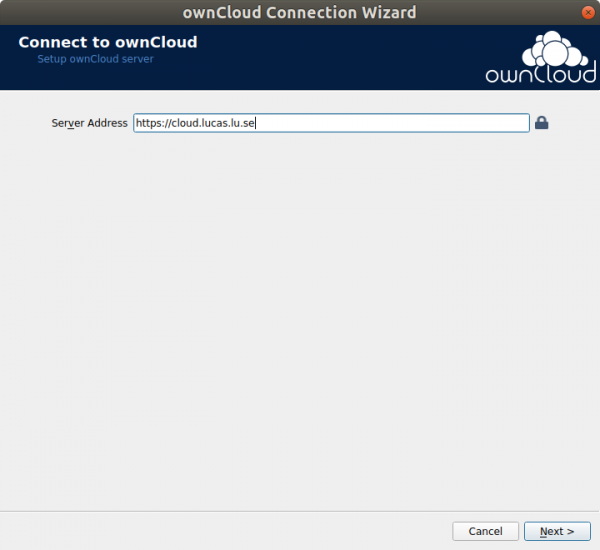
- 3.3 Click
Next… - 3.4 Add your LUCAS username and password. Note: LUCAS username is usually like LUCAT but without
@lu.se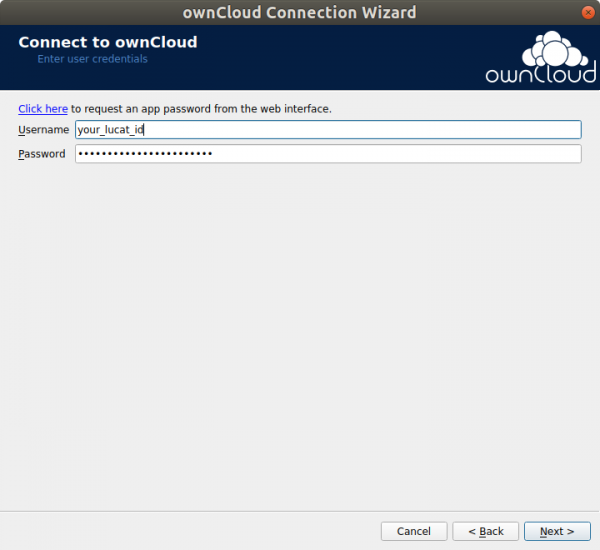
- 3.5 Click
Next…
Now you're ready to setup folder sync. If there is no folder sync configured the Connection Wizard will directly go to the folder configuration dialog.
4. Add a base sync/sharing folder
- 4.1 If you already have existing shared folders (for example your laptop backup) or you didn't create a folder sync when you installed the client, click on the button
Add Folder Sync connectionto add a new folder.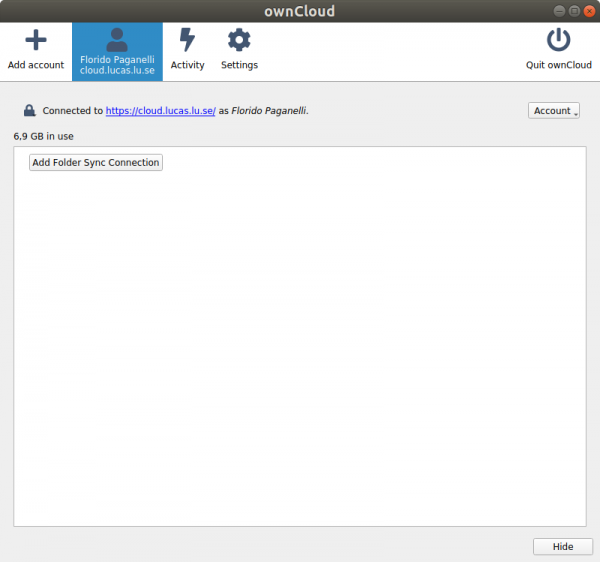
- 4.2 In the dialog that appears next, in the “Server” area, choose “Synchronize everything from server”. This is the most common setup for folder sync and it is pretty much what you get with
Dropboxandlu.box.com. It is wise to leave the rest of the things as default as in the picture below.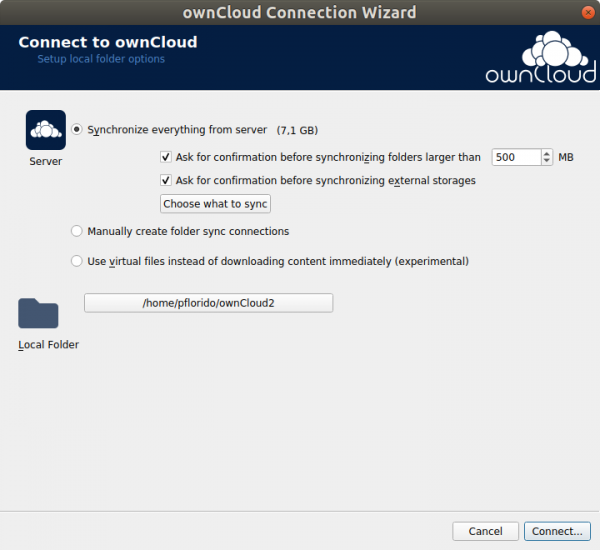
- 4.3 If you want to limit what is synchronized with the server click on
Choose what to sync- 4.3.1 In the “Choose what to sync” dialog you can tick the folders that you want to exclude. If you do not want to exclude anything press
OKand proceed to step 3.4.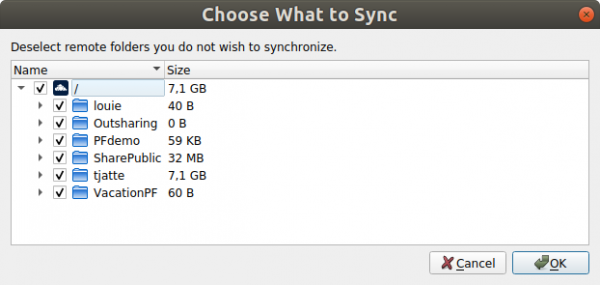
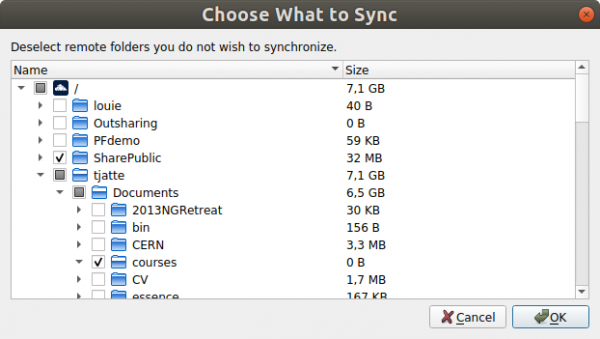
- 4.3.2 As an example of folder exclusion, in the picture below I only sync two folder of interest. The others I do not want to have on the machine I am configuring now. For example if 'louie' is the backup of the current machine where you are installing owncloud you do not want a second copy of all the data you already have, it will just overuse space.
- 4.3.3 After clicking OK the client will show the actual space required for the sync next to the “Choose what to sync” button.
- 4.4 In the “Local folder” area, select the path that you picked in the 0 Preparation step. If unsure just leave the default, for example for Linux is
/home/username/ownCloud.
- 4.4.1 If the folder is not empty the client will ask you what to do with it
 NOTE : if you choose “Start a clean sync” all the existing data in the folder will be deleted!. In the example above I will select to keep the data that is already in the folder, just to be safe.
- 4.5 Click on
Connect…. The client will start retrieving the files from the server.
5: (Optional) Select which folders you want to synchronize from the server
At any time you can go back to the settings and change which folders do you want to sync by simply ticking/unticking the box next to the folder name.
NOTE: when you unsync a folder, all the files in that folder will be deleted from your local disk. If there is a copy on the server, such copy will be kept. So make sure that there is a copy on the server by looking at your files on https://cloud.lucas.lu.se before deciding to un-synchronize a folder.
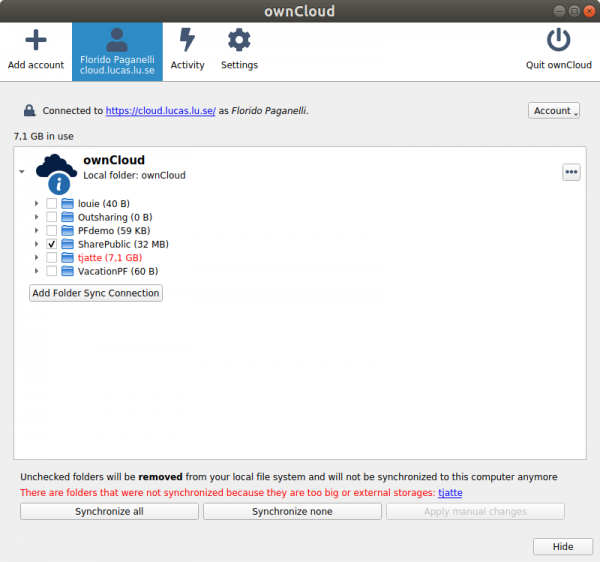
- 5.1 Open the ownCloud settings as described in 2. Open the ownCloud client
- 5.2 You can now tick/untick the folders you want to sync/unsync. The client may warn you about file deletion, if you accept it will start synchronizing.
- In the example below, I just want to sync the “SharePublic” folder and nothing else. All other folders will be deleted from my computer but kept on the server if they were synchronized before.
6. Sharing files with others
Sharing files with others is only possible via the web interface at https://cloud.lucas.lu.se . The Desktop client has no sharing functionality.
There are two ways to share files:
- a) by giving access to a specific user or set of users (Users and Groups). The receiving user must be logged in to the ownCloud client or online to the webpage in order to access the shared files.
 Good for sharing within Fysikum users.
- b) via public link - the receiving user does not need to be logged to the owncloud service.
- Good for sharing outside Fysikum/LU.
- with no password: (Not recommended: use only when data can be publicly available!) (Public Links)
- with password: (Recommended) (Public Links)
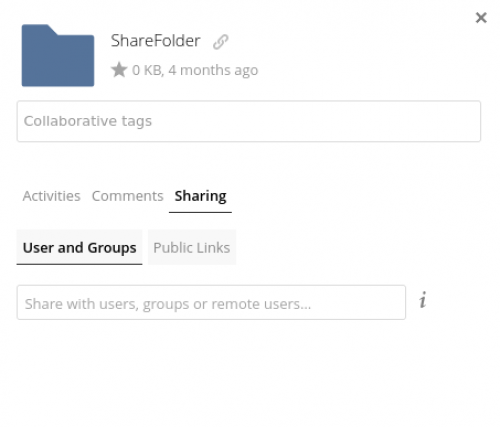
In order to demonstrate how this works, in this example we will share the folder ShareFolder.
- 6.1 Login to https://cloud.lucas.lu.se with your LUCAS account.
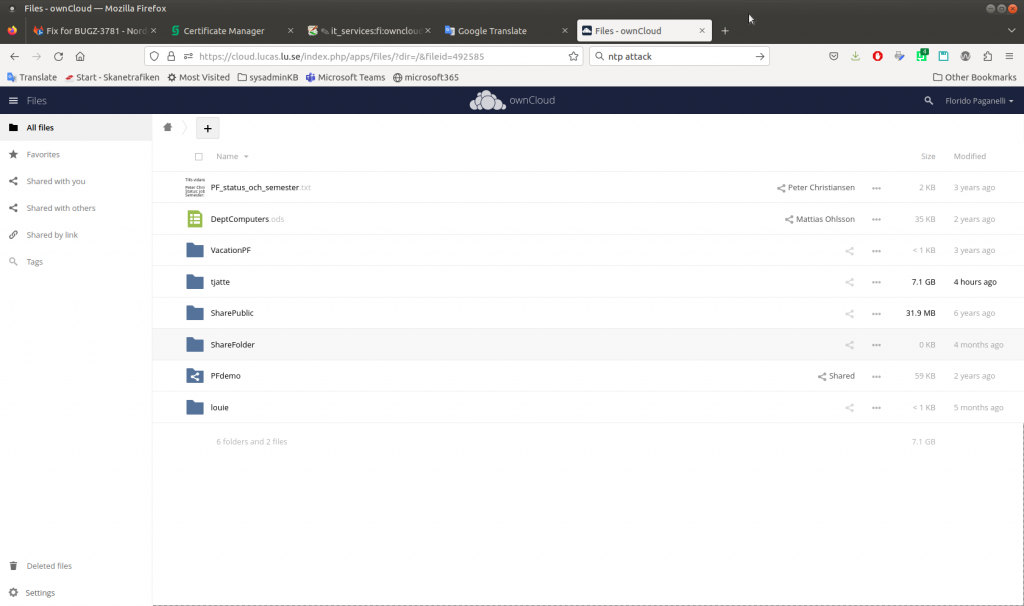
- 6.2 Select the folder you want to share by pressing the
 icon on the right side of the file. A dialog will appear on the right side of the page:
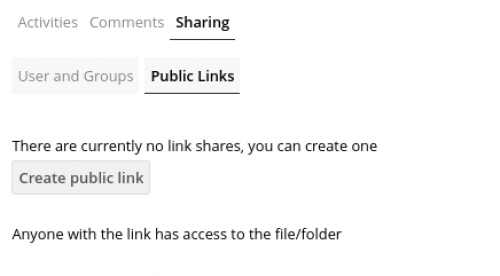
- 6.3 Select the sharing method, either Users and Groups or Public Links. See instructions below for each method.
6.3.a User or Group sharing
- 6.3.a.1 Click on User or Group sharing
- 6.3.a.2 Start writing in the fiels “Share with users, groups or remote users” the name/email of a colleague or a division name (there might be still old division names in the list)
- NOTE: Sharing with external ownCloud servers is currently untested and not supported.
- The selected user will now appear in the list. It is now possible to define which permissions the user has on the file by clicking on the cog icon
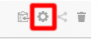 and selecting the desired permissions. The choices are automatically saved.
 - You can also send an email to notify the user and set and expiry date after which the sharing will be no longer valid.
6.3.b Public Links
- 6.3.b.1 Select the Public Links tab

- 6.3.b.2 Select
Create public link. A new dialog will appear: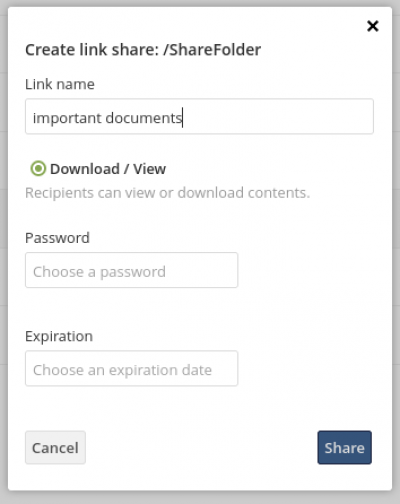
- 6.3.b.3 Fill in all the details that apply. Choose a name for the shared item for you to remember, choose a password if needed (recommended) and set an expiry date for the link (also recommended)

- 6.3.b.4 When done, click
Share. The link will be created.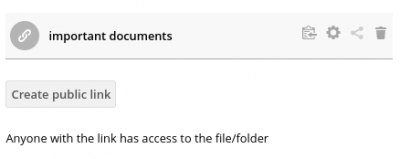
- 6.3.b.5 In order to obtain the created link, click on the paste icon on the right of the link:

- 6.3.b.6 Paste the link wherever you want.
Official documentation: https://doc.owncloud.com/webui/next/classic_ui/files/public_link_shares.html
it_services/fi/owncloudsharefiles.txt · Last modified: 2023/05/29 09:47 by florido
Except where otherwise noted, content on this wiki is licensed under the following license: CC Attribution-Share Alike 4.0 International
